Sunday 8 December 2019

Job Done!

Stripping off the elastic bandage after about 18 hrs revealed very little glue residue and that all cleaned up quickly with a cloth and some warm water. The glue line isn't as clean as when it came from the factory, but doesn't look terrible either. I was happy to see that the paint breakaway at the body joint had glued back almost imperceptively. 

I glued the nut back on with a small amount of Titebond and left for a few hours. Reconstruction complete 😀.


Strung up with a new set of D'Addario strings, I could then give the truss rod a tweak to take the very slight bend out of it. The picture doesn't really show this well, but it's pretty much ruler straight now.


All done and it plays quite nicely (for a  budget guitar!). It's certainly much easier to play than before the repair. As I said in the intro, the sound is pretty weedy, due to the nature of the ABS back and sides. It will be interesting to hear it through an amp. All ready to go to a beginner guitarist I have in mind now.

Summary & Lessons Learned: 

This has been probably the scariest job I've done to date and yet proved to be pretty straightforward really. 

I am really delighted that I took the route of repairing the truss rod rather than buy a new one. The whole project cost me less than £10 including glue etc and is probably a better end result than if I'd bought a new rod.

I've already mentioned that I should have scored the paint between the body and fingerboard extension, which would have prevented the paint flaking away. I was lucky that this glued back OK - it could have been a lot worse.

Also, when I glued up the fingerboard, I should have clamped the joint at the nut end more rigidly. There wasn't quite enough pressure from the elastic at that point and the joint lifted very slightly; not enough to affect the structural integrity or playability, but it would look better. I'll make a couple of specific clamps for this on the next job.

Other than that, I'm really pleased with how this went. I understand how a truss rod works now and feel totally up for attacking the Faith fingerboard now to resolve the iffy neck repair.

Watch this space....


Friday 6 December 2019

Reglueing the Fretboard

Time to re-assemble and glue the fretboard back on :-)

First, I prepared the 2 mating faces by scraping to remove the old glue residue. I heated the surface with a hairdryer as I did it to help soften the glue. 


I'd tried to get hold of some very long elastic bands to use to "clamp" the two parts together but the only ones I could find were from America! Then I thought of using sections cut from an old bike inner tube, which would have worked. 

But what I ended up using was an old "resistance band" from when I was doing physio on a neck injury a couple of years ago. I split it in half and it was perfect for the job.


Masking tape was stuck over the truss rod to keep the glue off it. Then TiteBond glue applied and spread into a thin layer, before removing the masking tape.


The glue will spread sideways under pressure, but should stay off the truss rod. Next I temporarily clamped the fretboard in place, including a small clamp to ensure that it was correctly located side-to side.


Then wrapped the elastic band tightly round the neck, starting at the nut end and removing clamps as I went. It's surprising how much pressure you can apply like this. I've cleaned off any glue that's squeezed out as I went along but I'm sure I'll have to stilll  get some off once it's set. In theory, the rubber band shouldn't stick to it - we shall see. Now just need to leave for 24 hours to cure.


Repairing the Truss Rod - 2

The initial attempt to make a new threaded insert for the truss rod didn't really work. I heated the end of the steel bar up to "cherry red" and then formed a mushroom shaped head on it by hitting with a hammer, but it wasn't really working well and the shape of the rod was deforming too much.


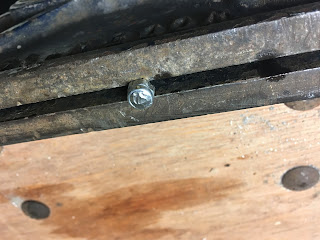
So I changed tack and tapped a thread onto the end instead; then put a self-locking nut on and peened the end of the rod over the nut (so it couldn't come off).


I'm pleased with the end result - it should work fine.

The next stage was to cut the bar to length and then tap a thread onto the other end to take the adjustment nut. Then reinstall the threaded rod into the truss rod channel.


I'd managed to find the washer from the rod rattling around inside the guitar, so reassembled using the new bullet adjuster nut that had arrived.


This shows how the rod is adjusted with an allen key. Just adding half a turn of tension produces quite a bend in the rod, though I'm sure it will be less pronounced when restrained in the neck.. 


And this shows how adjustment will work once the fingerboard is re-glued. 


Sunday 1 December 2019

Repairing the Truss Rod - 1

I've decided to try option 3 first - making a new threaded rod to fit into the existing truss rod. 

Seems to me that Option 2 would cost too much by the time I've paid someone to weld a new piece of round bar to extend the broken one, and I'd still have to buy a new truss rod nut.

Option 1 - buying a new truss rod - is feasible. You can get them off EBay for less than £15. But I'd have to adapt the neck, either by glueing in packing pieces or routing out a bigger channel.

So I'm trying Option 3 first, with a fall back on Option 1.

I'm going to buy a length of 5mm round bar from the local DIY store:


 and I've ordered a new truss rod nut off EBay:


So, total cost so far is £7.75!

I'll have enough steel to have 2 attempts and worst case is that I fall back on option 1, but I'll already have the truss rod nut to use.