I've done plenty of research on Google / You Tube etc and there is a fairly good concensus of how to do this job. Get some heat into the neck to melt the glue and then use a blade to "lever" the fingerboard and neck apart. Off we go then - how hard can it be?
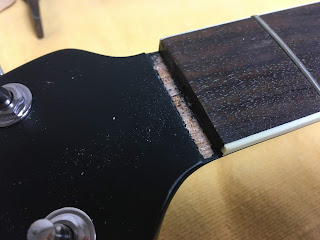
First action, after removing the strings, was to remove the nut. Not too difficult - there is normally (in my experience of 3 projects!) only a small amount of glue just locating the nut. Using a block of wood and a couple of gentle taps with a hammer it soon came away.
Some methods have you now removing a fret at each end of the fingerboard and drilling a small hole through the fret slot and into the neck, allowing you to use a couple of panel pins to positively locate the fingerboard back into the exact same position when re-glueing. I'm not doing that as I think I'd be more likely to damage the fingerboard removing the frets, so I'm going to rely on clamping side to side as well as down to the neck.
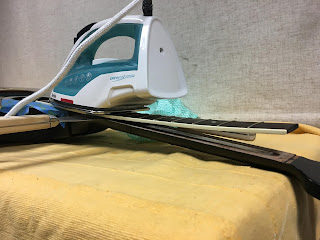
Now the slightly scary bit where the iron comes out! The idea is to use the iron to transfer heat into the neck by resting on the frets, which will conduct the heat into the joint. I have seen one suggestion to use a metal ruler between the iron and frets, which I guess would add some protection to the wood surface, but I thought I'd prefer to get the heat directly onto the frets. As it was, the upward bend in the neck meant that the iron probably wasn't actually in contact with a lot of the frets.
I set the iron to high and with a bit of steam as well. Starting from the nut end, I left the iron balanced there for about 10 minutes.
The next stage needs a blade to prise open the joint. You can get various specialist "pallette" knives etc from luthiery suppliers. No doubt they would be the right thing to use on good quality work. For this project I just got two good quality Harris 2" decorating scrapers from a DIY store - one with a sharpened edge and one with a blunt edge. Very carefully, I prised apart the joint - it actually needed a really gentle tap with a small hammer to get going.
Once the joint had started to open, I got some more heat on for a minute or two and then slid the blunt scraper in sideways under the sharpened scraper. Then, being very patient, it was a matter of working the blunt scraper down the neck a bit; applying more heat for a couple of minutes; and then prising the joint open a little more by using the sharp scraper between the blunt one and the fingerboard. It probably went at a rate of about an inch a minute?
I forgot to mention earlier that I taped up the finish on the body where it was going to be exposed to the blades and heat from the guitar, to try and protect it as best as possible. The next picture shows the way I used the 2 scapers well.
As I worked my way down towards the soundhole end, you could see a distinct upward set in the fingerboard. I'm not sure whether this was the heat and steam doing this, but fairly confident it would glue back OK. Just to be on the safe side, after removal I clamped the fingerboard to my workbench to dry out flat.
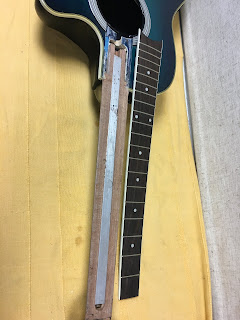
As I got to the part where the fingerboard is glued to the body, there were a couple of ominous "cracks", as the joint gave way, and then it just suddenly popped off.
The cracking noise was a small part of the paint finish parting company with the body - you can see the blue paint left on the underside of the fingerboard below. Not the end of the world - it is only about 1mm of visible paint at the junction. As a learning experience, I would carefully score down the junction between fingerboard and body with a sharp craft knife next time, which should avoid this happening again.
I was pleased to see how clean the joint surfaces were, with no wood broken away on either. They'll clean up really easily to reglue.


No comments:
Post a Comment