Saturday 24 October 2020

OM 01 Project - Making the Template and Body Mould

The book recommends building a clear template and a body mould to ensure accurate shaping and construction.

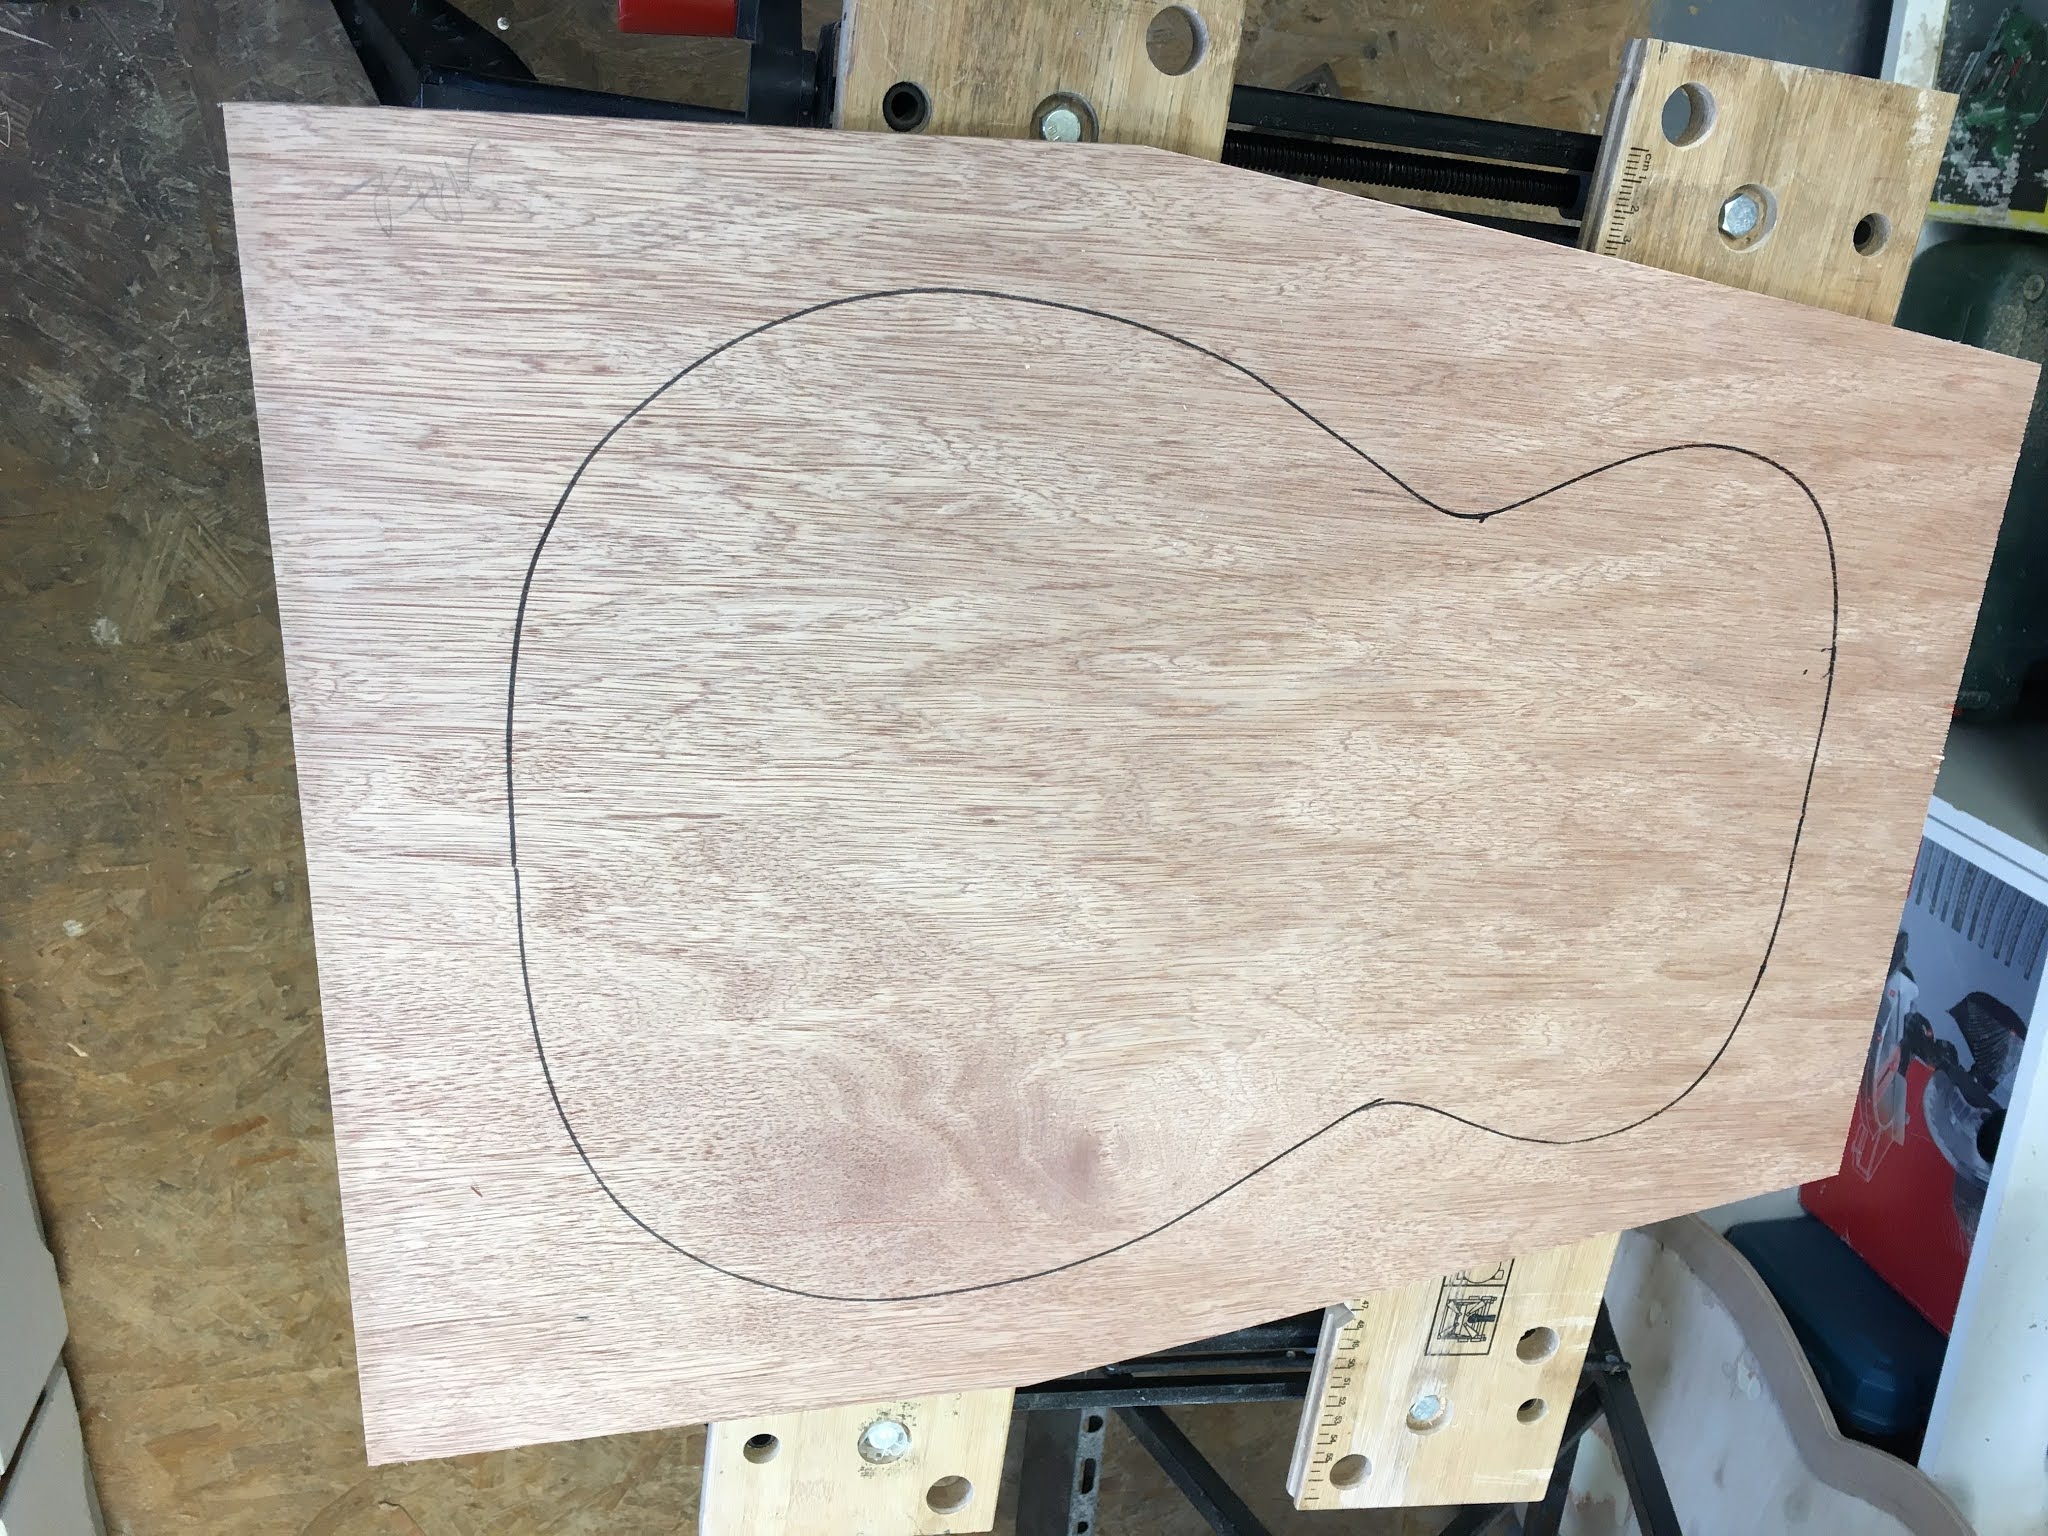
The template is made from clear polycarbonate and is just a "half" template, so you can flip it over for symetry. I simply traced the shape from the full size plan in the book and then cut it out using a fine-tooth metal blade in the bandsaw. Then sanded the edges to get nice smooth curves.


To make the body mould, I cut sheets of 18mm plywood into 4 - 600 x 300 panels and planed one edge flat. Then traced the outline of the body from the template onto each panel (2 for each side.


I put a narrow blade in the bandsaw, so it would cut tighter curves, and then cut the shapes out of the 4 blanks - 2 for each half.


Now I needed to sand smooth curves back to the traced shape. I bought a 2" drum sander that fits in the pillar drill, but needed to make a simple platform so that I could support the wood and sand something like a perpendicular face, right down to the face of the wood. 


I clamped the two pieces of each side together and sanded them back into the smooth outline. Because they were clamped together, I can be sure they are pretty much identical.


Next I cut 2 pieces of ply from the offcuts, that will form end plates allowing me to screw or bolt the two halves of the mould together. I also cut a load of 3" long "soldiers" out of some scrap softwood. They ended up being a bit less than 2" x 1" cross section after I'd planed them.

I glued and pinned the end plates and one of the soldiers at the waist, after ensuring that all was square etc., and left to dry. You can see here that I also cut waste away from around the body shape to take a bit of weight and bulk out of it. I actually took a bit too much off the lower part really - the instructions say to leave 2", but mine is a bit less than that - seems OK though.


After that had dried, I glued and pinned soldiers all around the edge, leaving them just slightly proud so I can sand back to the edge once dry. 

A day or two later, everything had dried solid and I used the drum sander again to sand back to a smooth curve. This photo shows it in the hand drill, but I actually found it easier to use the bench drill arrangement again. Once it was pretty much there, I finished off the last part with sandpaper by hand, ensuring that the faces were perpendicular to the top and bottom.


The finished product and the template still fits, which is pretty important! Now I just need to finish the other side.


With the other half of the mould now completed, I could finesse the joint so that everything sits nice and square when bolted together. I also sanded across the joins to make sure that there is a nice flat surface where the sides will be joined to the neck block and end block.


I used some scrap contiboard and ply to make this building board to clamp into an old Aldi Workmate. It will be perfect for working on once the build starts, and can be easily moved around the workshop.


There are two more parts I need to make for the body mould. The first is a clamping caul, which will be used to glue the top and bottom to the sides. I used a piece of scrap 12mm ply that was just big enough; drew around the template and then added 30mm around the edge and also marked a line about 10mm inside the edge. The idea is to rout out inside the inner line to leave about 3mm thickness, so that you end up with a solid perimeter and a hollow inner to allow the caul to flex and take up the shape of the back and front.

I cut the outline on the bandsaw. My routing out wasn't the greatest and I'd do it differently next time, but it does the job. The clamping caul is screwed down to the body mould in use and the screws adjusted to put the right amount of tension on the joint while it's being glued.


In place on the mould it looks like this.


The third part of the mould is a template for the shape of the sides. The front face of the guitar is flat but the back is flat from the bottom to the widest part and then follows a gentle curve to the neck end, which is about 15mm narrower then the bottom end. The template sits on the mould and is used to plane the sides to the right profile in the mould, after they have been bent.

I used 3.5mm ply and transferred the shape before cutting the inside out with a jigsaw and nice fine blade.


I didn't get any pictures of cutting out and glueing the curved battens but it's pretty straightforward and ends up looking like this (upside down to show the battens).


In place on the mould, you can see the curvature against a straight edge.


The last part is to make 10 stop blocks from some 1" square and 1/2" dowel. The protruding dowels fit into corresponding holes drilled into the sides of the mould. They are used to reduce the depth of the mould when it comes to gluing the top and bottom onto the sides. At this stage, I could only drill the holes in the mould for the top edge. Once the shape of the back is determined, I can drill the back set of holes.


So now I really have nothing else to procrasinate over - time to start doing some building! This mould has taken a lot of work to build but hopefully will be the basis of several future guitars, so worth spending the time on.


Saturday 10 October 2020

Noel, the Very Amateur Luthier gets serious!

5 years and 4 days ago, in October 2015,  I posted this:  https://noeltheamateurluthier.blogspot.com/2015/10/the-next-big-thing.html 

I had decided that I wanted to take the plunge and build a guitar from scratch, but concluded "I have quite a lot going on at the moment with a new job etc so, unusually for me, I'm not going to rush into this.Well, I certainly haven't rushed into it, and have had another 3 new jobs since then!

I also said that "I am thinking that I might try and do a trial of the bit that I'm most nervous about, which is constructing and carving a mahogany neck and building the dovetail joint between the neck and body. If I can make a decent job of that, I reckon I'll be OK to go for the full thing." Well, I have successfully made a new neck and it all went fine, so I've decided that now is the time to go for it.

I bought two books 5 years ago and have read them lots since:


and


Both of these books regularly come up as reference material on self-build forums  The first is very comprehensive - there appears to be nothing it doesn't tell you about making a guitar, but it is quite dry. The Kinkead book is more like a Haynes manual, with lots of colour photos showing each step. Between the two, it is fairly easy to get a good grasp of the processes involved.

Jonathan Kinkead's book includes full size plans for his Kingsman model, which is based on a 1929 Martin OM (Orchestra Model). But he also describes how to adapt the process to modify the guitar to your own requirements.

I had originally planned to build a Bouzouki and, earlier in the year, panic-bought the timber for this at the start of the Covid-19 lockdown! But the wood is (just) big enough to make an OM from, so off we go.

The spec is going to be: 
  • American Walnut back and sides
  • Western Red Cedar soundboard
  • Mahogany Neck
  • Rosewood bridge, fingerboard and head veneer
  • Maple bindings


The "standard" design is for a 25.5" scale length. I built a fretboard from scratch for the Gouzouki project, and fairly comfortable with that process, so I'm pondering about doing this as a "fan fret" or "multi-scale" design. Why? Mostly because I can; but with some logic in that I have been doing a lot of playing in dropped open tunings recently and a conservative fan fret design is allegedly very suitable for that style. Fan frets look something like this - the frets are not parallel like a "normal" guitar.

I'm also thinking that I might add a sound port in the upper bout, but these ideas can develop as I go along.

So off we go on the biggest project yet!


Saturday 3 October 2020

The Gouzouki Project - How it Sounds Compared to Guitar and Bouzouki

Now that the Gouzouki project is finished, I thought it would be nice to compare guitar, bouzouki and gouzouki sounds. It’s not really a particularly fair comparison as it’s my really nice Martin guitar v my very cheap entry level bouzouki v my home built gouzouki, but it can shine a light on my rubbish playing if nothing else 😂.


I totalled up how much the gouzouki project had cost yesterday. The target was to spend less than £100 on the conversion and it cost £78. (That excludes the immense amounts of money I have spent on tools obviously!) With the purchase cost of the original broken guitar, that’s less than £170 for an all solid wood gouzouki, which is not to be sniffed at.

I’m really enjoying getting used to it and couldn’t be happier with how it’s turned out - looking forward to getting out to some sessions, once some sense of normality returns.


The Gouzouki Project - Final Set-up

Final set up! Now it’s time to turn those big lumps of Corian into a nut and bridge and set the height of the strings.

I installed the tuners permanently and added my label to the inside alongside Faith's!


Then, after marking out the string spacing, I lightly filed slots in the nut and bridge to locate the strings - you really need to use specific slotting files for this to get it right.These are horifically expensive, but I couldn't think of a reliable way to get around using them.

At this point I dropped the nut blank and chipped a corner off it so had to start again. It’s quite brittle stuff this Corian.


I fitted the strings - very exciting - and roughly tuned to get the right tension on the neck, then adjusted the truss rod to correct the small bow.

To set up the nut, the process for each pair of strings is: slacken off strings; remove from slot; file slot a little deeper; reinstate and retension; check height by fretting at 2nd fret and measuring clearance under first fret; repeat until there is barely a paper thickness of clearance.


Once all the slots were done, I shaped the top and sides to be nicely rounded and rubbed down with progressively finer emery paper to get smooth. Then I used a couple of blobs of super glue to locate the nut against the top of the fretboard.

Moving on to the saddle, this is a much more complex shape to form. The point where the string pairs make contact needs to be different depending on what note the string is tuned to, to allow for the slight change in pitch as the string length changes when it is pushed down against a fret. This is called the intonation, for newcomers!

I had a pattern to work against from the book but also checked this by using a piece of cut off string in the appropriate place between the string and saddle. I think it’s actually still not 100% perfect, because I’m having to work around the existing guitar bridge, but it is close enough for my amateur ears!


This is also the point at which the action is adjusted - i.e. the height of the strings above the 12th fret. Fortunately, it was just about perfect, but I could have reduced the height of the saddle a little to correct if necessary.

Then it was a case of detensioning the strings yet again (to remove the saddle) and carefully filing the saddle to shape, then polishing up with emery as for the nut.

The last job was to screw-in the little cover over the truss rod adjuster. And that, my friends, is that!

I’ll try and post a video of what it actually sounds like in a following post but, after having had a half hour initial play, I’m really pleased with how it’s turned out.

The Gouzouki Project - Fret Levelling and Crowning

I reinstalled the neck at this stage (hopefully for the last time), which is a very easy task with this bolt on neck - 2 bolts accessed through the soundhole.

The frets need to lie in a level plane, so that the "action" can be set nice and low (making it easier to push strings against frets) but without allowing the strings to "buzz" against any high points further up the neck.

Firstly, the fretboard needs to be as straight as possible by tweaking the truss rod, then I ran a sharpie over the top of each fret to track what material is taken off each one.


I had a very lightly used sharpening stone that is nice and flat and used that to run backwards and forwards along the frets until they were all showing material removed (i.e. no sharpie left). At that stage they should all be level. Some people use a file for this but the stone worked really well for me.


Then I reprofiling the frets to put a curved shape back on them, using a special fret file that is set to a 2mm radius.


That’s the basics done really - after that, it’s a case of working through finer grades of emery paper to progressively smooth off and polish the frets and fretboard. At the same time I made sure the fret edges were nicely rounded and smoothed off to be level with the edge of the fretboard.