Friday 31 May 2019

Mission accomplished?

Hmm, not quite. It was ready to take to the festival - just, although it really needed a couple more coats of oil. 

The bigger issue was that it needs a good setting up as, unsurprisingly, the neck geometry has changed slightly while I have been doing the repair. I think the head has only moved forward by maybe 1mm but that has had quite a big effect on the action and playability, particularly when playing open chords. (Actually, it might have been like that before I had it, as it was already broken when I got it.)

I'm taking this as a positive as I can learn about setting up on what is still a fairly cheap guitar for me.

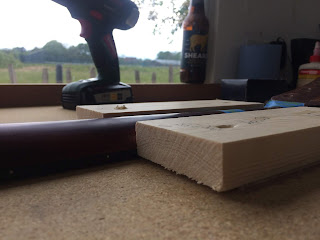
This photo doesn't really show how high the action is at the first fret, but it is at least 2mm when you fret at the third fret. From my research, that should be more like 0.5mm.


First I tweaked the truss rod to take a bit of bend out of the neck - the first time I have done that and it was quite a scary thing to do! A little adjustment goes a long way is what I found, but I have got it about right I think. 


It is still quite high though and, again, research (aka Google / YouTube!) suggested that I needed to shave a bit off the nut height, so I tapped that off and sanded about 1mm off the bottom. It's a lot better, but I think it possibly still needs a little more taking off. 

I was now getting some fret buzz but relieving a little tension on the truss rod stopped that. I'm pausing now to consider the next move, as I can't decide whether to shave some more off the nut or drop the bridge a little (I think the former, but need to work out which it should be, rather than blindly experimenting and getting it wrong). 

It's playable now though and sounds pretty good for a £90 guitar (which it should, as all solid wood).

Refinishing

With the nasty stain removed from the previous finish, you can actually see that the original scarf joint in the neck runs across my repair, so there are now about 7 pieces of wood glued together in this area! This is the tung oil that I am using to refinish the repaired area. Basically the process is to rub it on with a lint free cloth; wipe any excess off after 20 mins then repeat 24 hours later. The first 2 coats are thinned down 50/50 with white spirit.


I reassembled the machine heads etc and glued the nut back in while I was waiting for the  first coat to dry.


A couple of side and rear views of the repair. I'm quite pleased how it turned out really, considering I just used a scrap of hardwood I had lying around!


It's had about 5 coats here and is darkening up nicely. I don't think it will ever be "discreet", but that wasn't what I was aiming for.


Splinting the Neck - 2

24 hours later and I could strip the clamps off again. Feeling much stronger now ☺ I used this rasp (also known as a b@st@rd file, or have I got that wrong?) to roughly get the shape down to the neck profile, then swapped to a finer file. Final smoothing with sandpaper will come after the next part of the process.


I altered the previous jig so that I could use the router again to take off a 5mm depth of wood from the back of the neck. If my calculations are correct, that should just break the surface of the truss rod channel. I got excited here and forgot to take pictures of the next part, but I actually went slightly too deep and just caught the adjuster nut, but it should be OK. It meant that I had to carve a shallow channel into the replacement wood to clear the truss rod adjuster.


Everything glued and clamped up again...


... then 24 hours later you can see here the 6mm thick piece of hardwood that I glued back in. The rough looking bits are where I made a bit of glue / sawdust filler to fill in a couple of small gaps resulting from my inadequate woodworking!


Then rasped/filed down to the rough shape again ...


... before sanding to a smooth finish with medium then fine sandpaper. I also sanded back the dark brown stain that the previous repairer had used. Ready for finishing now.


Sunday 19 May 2019

Splinting the Neck

I now need to cut some hardwood splints to glue into the channels. Out comes the bandsaw that I bought some time ago off EBay, but haven't even attempted to use yet. I've never used a bandsaw before, so this will be a steep learning curve!


First problem - motor spinning but saw blade not moving. That was solved by reattaching the drive belt. It can be adjusted across 3 different pulley sets to run at different speeds and just hadn't been put back on properly.

Next I adjusted the guide fence to the right distance and tried to cut a slice of wood off the back of the cill. The blade wandered all over the place, as I hadn't adjusted the blade guides properly. 

With that sorted, things were looking much better but it was really struggling to cut the dense hardwood, at which point I realised that the blade is blunt as anything so I need to get a new one.

I resorted to my trusty handsaw.... Now I need to form 2 pieces, roughly 13 x 13mm cross section and about 50mm long.


This is one of them. The ends need to match the curve of the router cutter so I made a simple template by routing a hole through some hardboard using the same cutter and then scribed the shape onto one end of the splint.


The band saw has a sanding disc as well (but the side table to support the wood is missing, so I had to very carefully do this by hand. Don't do this at home boys and girls.)


I used the sanding disc to carefully sand down to the scribed line and then did the final shaping with a piece of sandpaper, before repeating at the other end. I took a lot of time over this to get as snug a fit as possible. Love this sanding disc - it made the job so much easier than doing it all by hand.


I showed the area where the wood had splintered away on the junction with the fretboard on an earlier post. I cut this away and, before gluing up, I put some glue in here and mixed it with some of the sawdust to form a very basic filler. I'm not sure how well that will work but I think that it must be better than just filling the void with glue


Then I glued and clamped everything up and removed the squozen out glue again with a damp cloth.


I'll give that 24 hours to dry and then use a rasp to roughly shape the splints back to the neck profile, before starting the reinforcement across the back of the neck. 

The neck is starting to look a lot stronger now 😊.

Saturday 18 May 2019

Making Some Clever Jigs and Routing out the Sides of the Neck

In order to accurately rout out the channels in the neck (into which strengthening "splints" of new wood will be glued) I needed to make some jigs to accurately guide the router along the neck. I though long and hard and the sequence below was the simplest way I could come up with.

I used an old piece of kitchen worktop upside down on the bench as a base board, then screwed a planed softwood batten to the worktop on either side of the neck. As the neck is slightly tapered and the softwood is hard up against where the headstock flares out this effectively held the neck in a fixed position.


The softwood needed to be packed up underneath with some hardboard so that the top of the softwood was at the same level as the top of the neck.


Using my spiffy new router, I made a jig out of hardboard. The channels will guide the router down each side of the neck.


The jig was taped to the battens to locate it (see picture further down)


This bush attaches to the bottom of the router. The projecting part sits in the slot in the jig. 


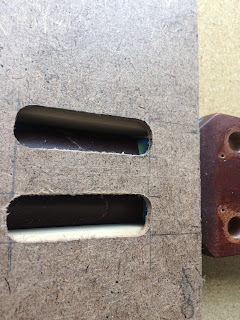
After routing, this shows the channels that have been cut in each side of the neck. The line at the bottom of the hole is the bottom of the break in the neck. On the left hand side there was so little wood remaining that it broke away. I'll fill this with some sawdust and glue filler.


I have collected some of the sawdust, so I can mix it with superglue to use as a filler in any unsightly gaps that I end up with! (I collected some finer sawdust from sawing to use for this afterwards, which was much better.)


After stripping the jig away, the channels look like this. I'm quite pleased with that for a first attempt.


Those paying close attention will note that I have changed the plan here (it's my guitar - I can do what I want!) I was planning to rout and splint each side separately to keep as much strength in the neck as possible, but decided I'd do it really carefully but both sides at the same time. Mainly because I am impatient.


Friday 17 May 2019

Stabilising the Neck

The first three things on the list are all about stabilising the neck and getting it into a strong enough state to work on. The plan was:
  1. Clean off as much of the old glue as possible, including down the back of the fretboard.
  2. Glue the fretboard back to the lower part of the neck.
  3. Glue the upper neck onto the lower neck and fretboard.
When I came to do it, I realised that it would be more straightforward to do 2 and 3 together.

Cleaning off the old glue was done with a combination of sharp scrapers, picks, a file and sandpaper.


It all came up pretty well really. The hardest part was getting the glue off from between the fretboard and neck but I just patiently pulled paper through the joint, applying a bit of pressure as it went and it seemed to be reasonably clear after a while. It is certainly as good as I can get it without removing the fingerboard.

Next I made a support to fit snugly on the fingerboard, so I could clamp the joint while glueing it. In other words, I cut some slots in an old piece of wood to clear the frets!

Liberally applying Titebond glue everywhere, I worked it down the fretboard / neck junction by springing it open with a scraper and then using a small paintbrush. I got plenty in so it could squeeze along the joint and back out.


Next, I clamped everything down to the workbench nice and firmly, cleaned up the squozen out glue and left it for a few hours. (Is squozen a word? It should be, if not.)


And after releasing it all, voila - one stable (but not very strong) neck! Having said that, I think this is now probably about as strong as the original repair was. Looks like it would snap at the first hint of a breeze to me though!


I also started looking at how to do the next part - routing out the channels for the new wood -  and decided that my router isn't up to scratch, because it's ancient, rubbish and underpowered! So I treated myself to a nice shiny new one. Amazing how things have come on in 30 years.... Now to make a routing jig.

This is where the channels will be routed, either side of the truss rod channel, and they will go almost as deep as the back of the fingerboard.


I've also done a couple of sample patches of finish on the hardwood I'm using for the "splints". I did take a picture, but it's not clear enough to show any discernable difference between the finishes. But it looks like Tung oil is a pretty good match for the existing satin finish, so I'll probably go with that.